Document Template: How do I add my own logo?
- Click on Settings.

- Click on Document Layouts & Logo Settings.
- Click the blue Edit Layout and Logos button.
- Click Next once and you should reach the Edit Logo screen.
- Click Add Image.
- To add your own logo, click on one of the Upload Image options.
- To add a logo from our Logo Library, select a category (plumber, builder, etc.) and then select your required logo.
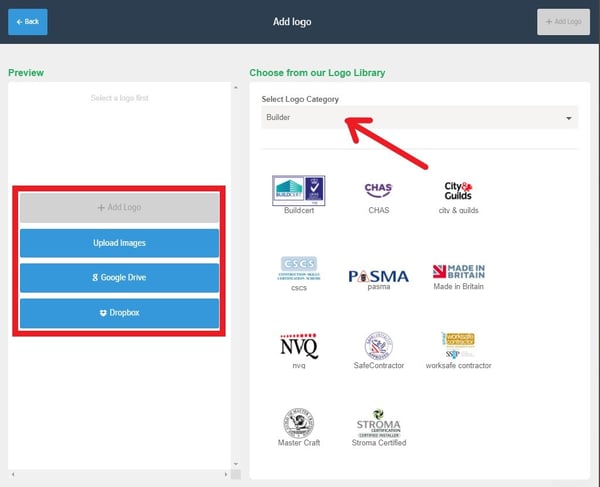
- Once you have selected/uploaded the logo you want, click the green Add Logo button. Your logo will now appear in the top left hand corner of the document.
- Click on the logo to resize or reposition it.
- You can add more logos at this stage by following the previous steps again.
- Once you are happy with the way your document looks, click Next until you are returned to the dashboard.
To find out how to add bank details to your invoices, click here.