1. Click into the certificate you want to change the installation address for and then go 'Options' > 'Edit'

2. This will take you to the creation section of the certificate and in the top right. If you click the 'Options' button, that should give you the option to 'Edit site/installation address'

3. From there select the site address you'd like to add into the installation address of the certificate and click Use Selected Address.
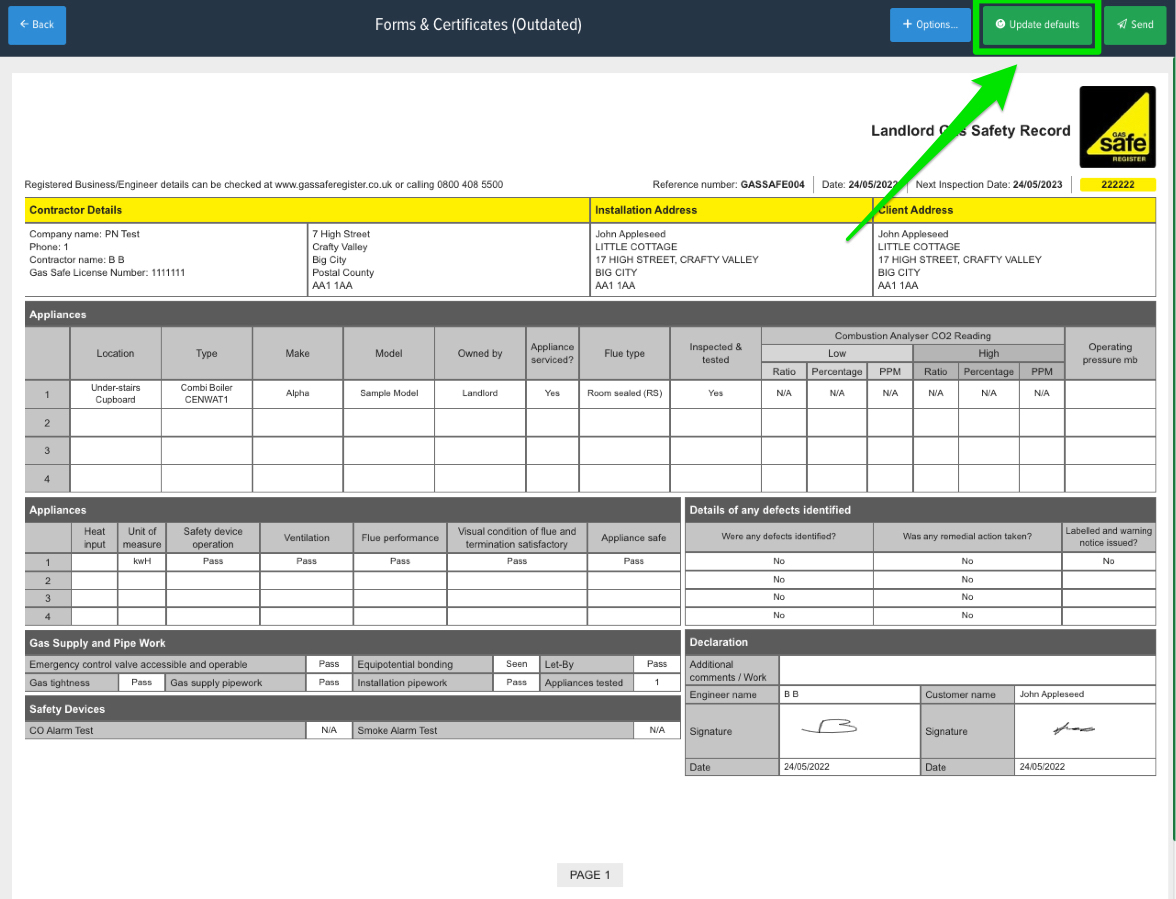
4. After this go through to the preview page of the certificate and click the 'Update Defaults' button in the top right.
5. That should bring up a popup, put a tick in the green bubble next to “Installation Details” and click the green "Confirm" button to update the Site Address
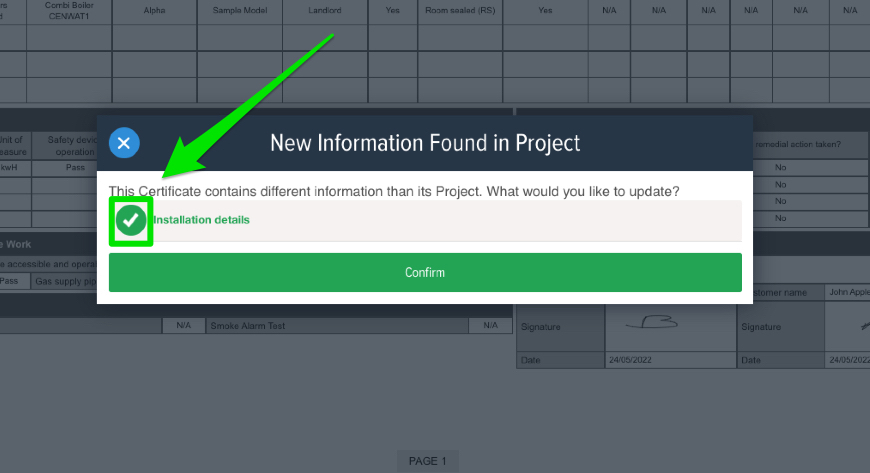
Your Certificate should now contain the new Site Address

Important
It’s worth noting that while the Online View of the Certificate will update immediately, it is not possible to update the PDF version that your Customers have already received via email. If the Certificate has already been sent via email then we would advise sending a new copy to ensure your customer has the most up to date version.