This article will help show you through creating appointment types that can be used to book appointments by team members and customers
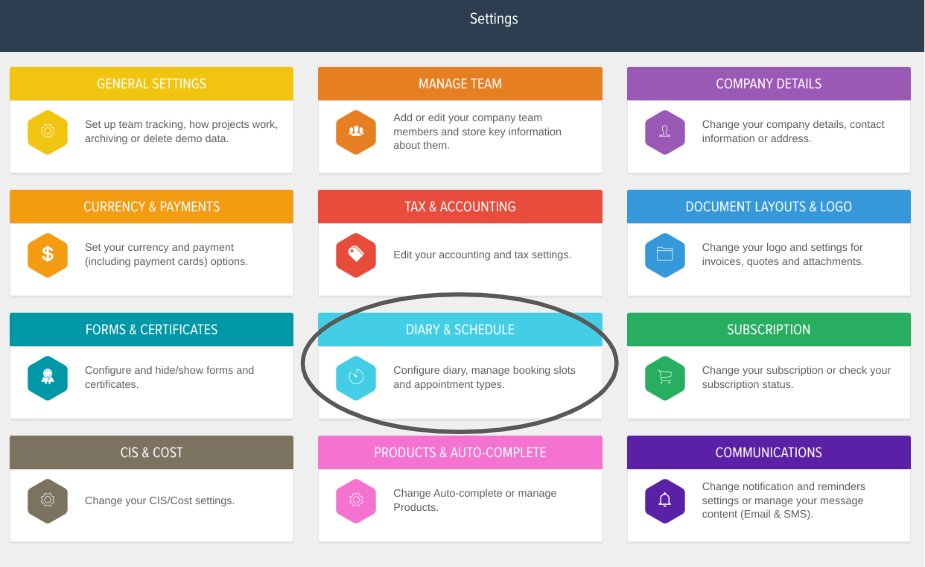
To create your Appointment Types, go to Settings (Cog top right of the Home page) and from there go to Diary & Schedule.

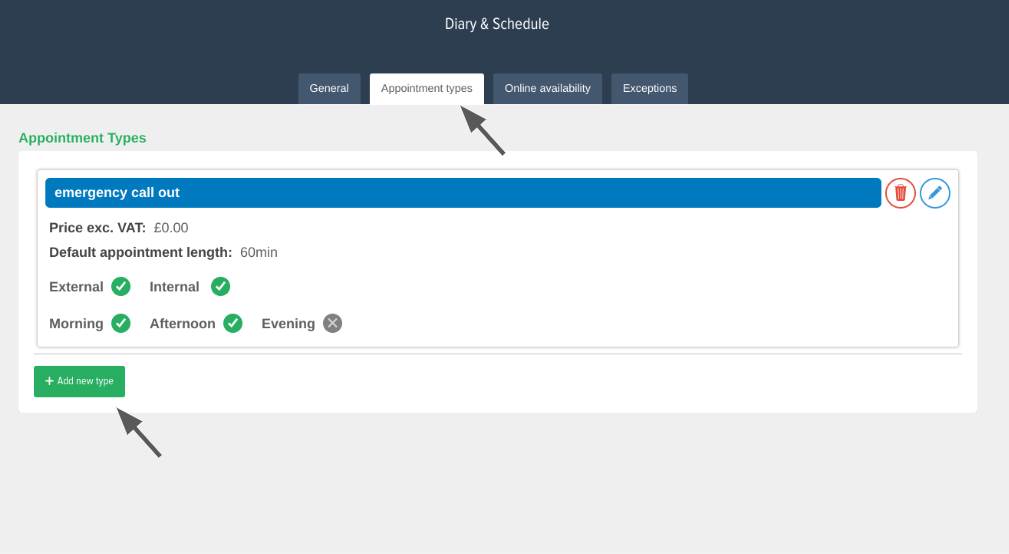
When in the Diary & Schedule settings, select Appointment Types at the top and in here you can create your own customised Appointment Types.

The Appointment Name will be Title of the appointment when creating the appointment in the diary. This is also what will show for the customer when they go to book an appointment with you via the Customer Portal (Premium Feature)
Colour - colour code the appointment within your Diary so you know what type of appointment it is.
Description - the description of the job which will appear on the appointment in the diary.
Default appointment length - The set time for how long this type of appointment would take.
Price - Your charge rate for this type of appointment (This can be visible for customers in the customer portal when booking in appointments with you)
Message before and after booking - This is seen by customers when booking in appointments with you via the customer portal.

Available for booking - the External option is for allowing customers to book this type of appointment with you via the Customer Portal. The Internal booking is to allow yourself and team members to use this appointment type.
Availability - What part of the day you would like this type of appointment to be available for bookings.
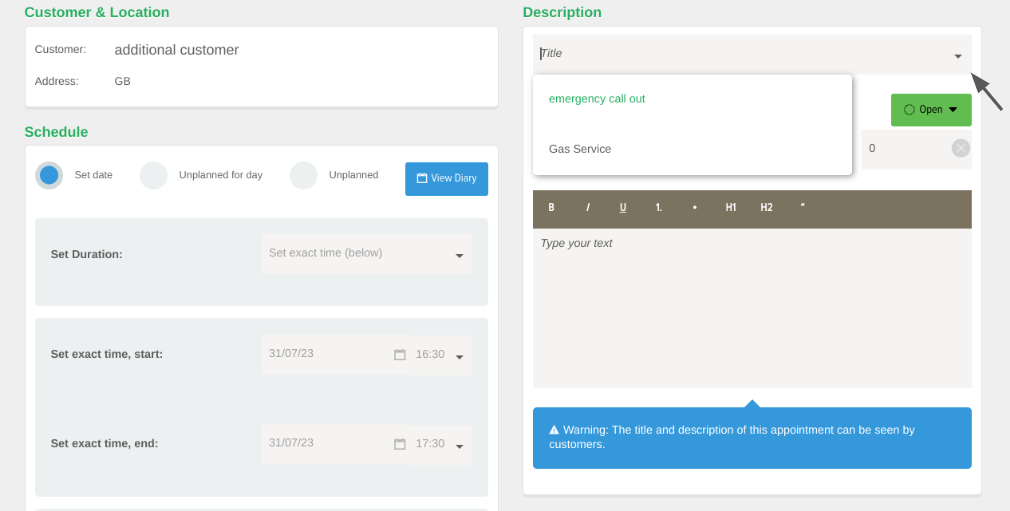
Once created these appointment types can be used when creating an appointment in the diary by selecting the drop down in the 'Title' box for the appointment.

For Premium Tier users, customers can book appointments or request time through the Customer Portal. When they go to request an appointment they will have a drop down with all of your appointment types which they can select from based on the type of appointment they're looking to book in with you.

